

Programming Sounds for Eighties Songs on Your Synth Workstation
- Narf

- Dec 22, 2022
- 10 min read
Updated: Jul 12
If you’re playing in an eighties cover band and want your synth sounds to match the original recordings, you need a good ear, knowledge of the keyboard you’re programming, and research into how those sounds were originally made. Presets alone won’t get you there. The gear used back then had specific quirks and limitations that shaped the music, and understanding those details makes all the difference.
Understanding how the iconic Oberheim OB-Xa brass was used in Jump by Van Halen is part of the work. So is breaking down the layered vocal pad and sparkling synth bell in Take On Me by A-ha, or the signature JX-8P brass in The Final Countdown. The deep metallic ring of the DX7 Tubular Bells in the Top Gun Anthem and identifying samples such as the orchestral hits in It’s a Sin also stand out as defining sounds. Accuracy comes from knowing the original source and recreating how the sound behaves in context.
Learn the Basics of Synthesis
Before anything else, get familiar with how sounds are built. Watch a few tutorials on synthesis. Many of them are easy to follow and cover the essentials in just a few minutes. A good starting point is the ten-minute video from Berklee Online called Synthesizer Basics: Amplitude, Oscillators, Timbre. It gives a clear overview of the core concepts. You can watch it here:
There’s also a series of vintage videos from Matrix Synth featuring Dean Friedman, the director of the New York School of Synthesis that were produced in the 80s. It’s a longer watch, but it covers the fundamentals and has a bit of charm.
Start with oscillators, envelopes, filters, and LFOs. These are the tools you use to shape sound on any keyboard or plugin. Once you understand what each one does, things start to make more sense. A filter shapes the tone. An envelope controls how a sound starts and ends. An LFO adds subtle or noticeable movement. These are the foundations, and they show up in every synth you’ll work with.
You don’t need to learn everything at once. But the more you understand how these building blocks work, the easier it becomes to hear a sound and know how to approach it. Whether you’re starting from scratch or tweaking something that’s close, these tools are what guide your decisions.
Train Your Ears and Play the Song
Start by learning to play the song. Go through it part by part. Listen closely to what each hand is doing and pay attention to how the sounds are layered. Some parts sit right up front, while others stay deeper in the mix and carry the feel without calling attention to themselves.
Playing by ear helps with all of this. It sharpens your ability to hear pitch, tone, and character. That skill lets you pick apart the difference between a filtered pad, a phased electric piano, or a layer of both. You learn by listening, comparing, and making small decisions as you go. The more time you spend doing it, the more accurate your sounds become.
Once you’ve identified a part, try to describe the sound using clear attributes. Is it warm or bright? Metallic or soft? Does it sound thick, thin, percussive, or smooth? Assigning words to what you’re hearing helps lock in the qualities you’re aiming to recreate. For example, the main riff in Rebel Yell by Billy Idol has a percussive, bright quality. It feels almost marimba-like, with a layered octave that gives it extra weight. Describing it that way keeps you focused while programming. If your version doesn’t feel percussive or bright enough, you’ll know what needs to be adjusted.
This kind of listening practice pays off. The clearer you are about what you’re hearing, the easier it is to recreate those sounds with purpose.
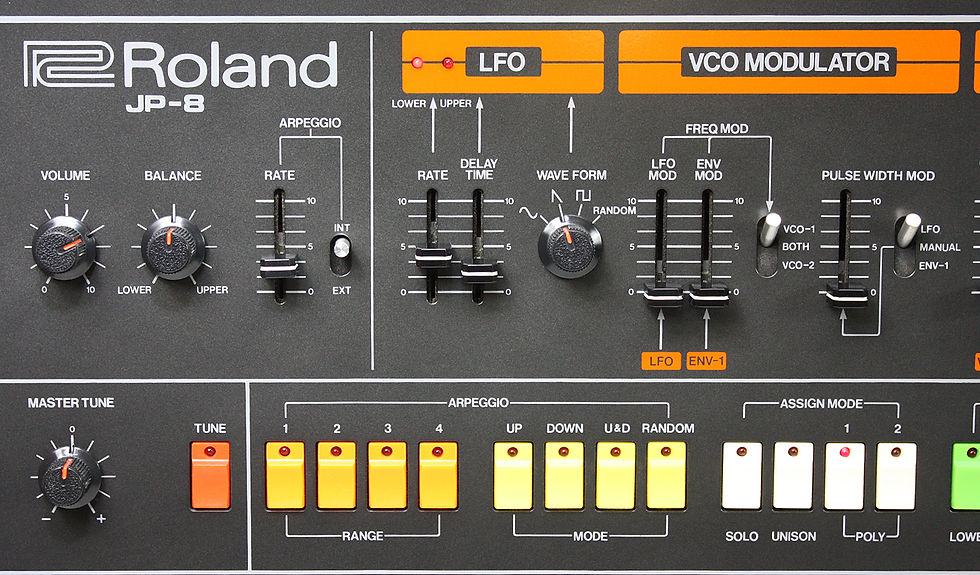
Study the Instruments That Made the Sound
The best way to recreate a synth part is to understand the instrument that made it. Learn how the original gear worked, how its controls were laid out, and how players used them in real musical contexts.
While working on Radio Ga Ga by Queen, I was puzzled by the bass arpeggio jumping between two and three octaves. Looking at the front panel of the Roland Jupiter-8 helped me spot what was going on. The octave range could be changed in real time by tapping buttons during playback.
That small detail explained the variation and gave me a way to recreate it properly. On the Nord Stage 4, I was able to do that by using Morph Assign to do the arp range switching.
For Take On Me by A-ha, I couldn’t tell at first whether the lead was a saw or a pulse wave. It had a layered, multi-octave character that wasn’t easy to define. Looking at the Juno-60 helped me figure it out. It combines a saw and square wave, with the square adjustable to a narrow pulse. The sub oscillator adds body to the bottom end. That setup made sense of the full, two-handed sound in the intro.
The OB-X is another good example. Its brass sounds were a staple of early eighties tracks and still show up today. Understanding how the detuned oscillators, filter envelope, and voice panning work on the OB-X goes a long way in helping you recreate those thick, drifting stabs on modern gear.
There are excellent videos on YouTube where you can watch musicians demo vintage synths like the Jupiter-8, Prophet 5, OB-Xa, and Juno-60. Even a few minutes of seeing and hearing how these instruments behave will give you better instincts when programming on your own keyboard.
Know the Context of the Time
In the early eighties, analog polysynths were everywhere. The Jupiter-8, Juno-6, Prophet 5, and Oberheim OB-Xa through to the OB-X8 shaped the sound of that era. These synths delivered the brassy stabs, warm pads, and punchy sequences that became a staple across pop, rock, and everything in between.
This was also a time before MIDI. Most synths couldn’t communicate with each other easily, and layering sounds from multiple keyboards was more complicated. Arpeggiators, when available, ran independently with no way to sync to a common tempo. Sounds were often played live in single layers, and switching patches mid-song usually meant switching instruments entirely.
By the mid-eighties, digital synths started to take over. The Yamaha DX7 was used on countless recordings between 1984 and 1987. Most musicians didn’t get into programming it from scratch. They stuck with the presets, maybe tweaking them slightly. That’s why so many tracks from that period feature the same electric piano, tubular bells, and bass patches. If a keyboard player was on the gig, there’s a good chance they were using one of the original 32 DX7 sounds.
One of the reasons the DX7 became so dominant was its ability to produce sounds that analog synths couldn’t replicate well. It handled metallic textures, crystal-like tones, and colder, more polished sounds that shaped the mid-eighties sound palette.
As MIDI started to become more common, things changed. Layered sounds were suddenly easier to manage, and keyboards could control each other through a single cable. Arpeggiators could be synced to a shared clock, and more complex setups became realistic for live and studio use. This opened up new possibilities for arranging and programming that weren’t possible just a few years earlier.
Sampling was also gaining ground. The Fairlight CMI was cutting-edge and expensive, but many of its sounds ended up in major releases. Tracks like Sledgehammer used the Shakuhachi as-is from the EMU-Emulator II, and Running Up That Hill featured the Cello 2 preset with little to no change. These weren’t deep custom builds. They were factory patches dropped straight into finished songs.
Toward the end of the decade, sample-based synthesis became more accessible. The Korg M1 launched in 1988 and quickly became a standard. Its built-in waveforms and layered architecture helped define the smoother, more produced sound that carried into the nineties. Knowing when these instruments were released and how they were used makes it easier to trace where the sounds in each song are coming from.
Watch Real Studio Breakdowns
Hearing directly from the musicians and programmers who worked on these records gives you a level of insight that manuals and forums rarely provide. Anthony Marinelli’s YouTube channel is a great example. He walks through the actual synths used on Thriller and brings in the original players to explain how they approached the sounds. His breakdown of the Jupiter-8, Prophet 5, ARP 2600, and Minimoog helped me rebuild Thriller on the Montage with far more confidence and accuracy.
Another one I keep going back to is Steve Porcaro’s interview about how he recreated the sounds for Africa and Human Nature. There’s something valuable about hearing how a sound was approached from multiple synths until it felt right. One thing that stood out was how the brass sound in Africa was built from pulse waves, not the usual saw wave. That kind of detail changes the way you listen and the way you program.
Listen to Isolated Keyboard Tracks When Possible
Listening to full mixes can make it difficult to figure out what’s actually going on in the sound. Without the ability to solo the part, it’s easy to make assumptions or miss details that matter. Sometimes your memory can play tricks on you, making you chase something that wasn’t even in the original track.
When I was working on It Must Have Been Love by Roxette, I initially mistook layered electric pianos and early sample-based strings for analog pads. What I thought was a guitar turned out to be a metallic wire synth sound from a Synclavier.
With Video Killed the Radio Star by The Buggles, I would never have been able to sort through the stacked parts without access to the isolated keys.
Access to isolated stems made all the difference. It allowed me to hear exactly what was happening and recreate the sound with more accuracy. Without them, even trained ears can get it wrong. The sounds you program can only be as good as how well you’re hearing what’s in the recording.
Where do you find isolated tracks? YouTube is usually the best place to start. Try searching for “[song name] isolated keys” or “[song name] keys only.” Forums like Gearspace, Reddit’s r/synthesizers, or even a simple Google search can lead you to stems, solo takes, or raw multitrack sessions. Sometimes you’ll come across remixes that strip out the elements you need. You can also do it yourself using Logic’s stem splitter or AI-based stem splitting sites like Fadr or Moises. It takes a bit of digging, but they’re out there.
Use the Right Effects and Techniques
Once you’ve locked in the core sound, pay attention to what’s shaping it further. Effects like chorus, phaser, flanger, delay, and reverb often play a big role in how a part sits in the mix. These aren’t just added for polish. In many cases, they’re essential to the identity of the sound.
Take Where the Streets Have No Name by U2. The Edge is known for using effects as part of the instrument’s voice. When I recreated the synth part for this, running it through a shimmer reverb pedal didn’t just add atmosphere. It completely redefined the sound.
You also need to understand the synthesis techniques being used. Oscillator sync, filter envelope shaping, and modulation routing are all part of the sound design vocabulary of the eighties. Let’s Go by The Cars gets its aggressive, tearing lead sound from the Prophet-5's oscillator sync. The same goes for Why Can’t This Be Love by Van Halen but on an Oberheim. That bright, cutting tone comes from a synced oscillator being pushed by a sharp envelope and shaped by modulation.
These kinds of techniques go beyond the basic waveform. They shape how the sound responds when you play. Getting that part right is what makes a patch feel authentic rather than just close.
Understand the Limitations of Your Gear
Modern workstations and synths may not have the same waveforms, sample libraries, or synthesis methods as the originals. Even so, you can recreate much of the behavior if you understand how the original sound was produced. Analog oscillators were known for slight instability. The OB-Xa, for example, would shift envelope durations depending on temperature. To emulate that kind of behavior, I apply a slow, subtle random LFO to two panned and slightly detuned oscillators. This simulates the natural drift that occurred in analog gear. When I run into a sound that cannot be recreated accurately using synthesis alone, I’ll resort to sampling, but only as a last option.
Rest Your Ears
There’s such a thing as ear fatigue. Listening to the same sound on repeat can wear you down and affect your judgment. What sounds right at the end of a long session might feel completely off when you hear it the next day. Stepping away gives your ears a chance to reset. Come back fresh, listen again, and you’ll often catch things you missed. Small adjustments made with clear ears can make a big difference.
Organize Your Setup for Performance
Set up your splits and layers to follow the structure of the song. Each section should be accessible without confusion. Label your sounds clearly and rehearse transitions. A well-laid-out performance setup keeps your hands focused on playing rather than switching.
I do my best to stick to my one performance or combi per song approach. On the Yamaha Montage, I use Scenes to switch between song parts. On the Kronos, it’s KARMA modules and scene switching. On the Fantom, I take advantage of Mute Groups using the assignable pads. On the Nord Stage 4, morph controls allow for a surprising amount of flexibility, though there are times when I still have to create multiple programs for one song. Gig Performer, which is easily the best plugin host I’ve used, handles this with its Song Part feature. It lets you build the structure of the song from the ground up and switch between sections cleanly without needing to reload anything. Having a reliable way to move between parts makes all the difference during a live set.
Practice with Purpose
Recreating eighties synth sounds requires detailed research, critical listening, and a clear understanding of the tools used at the time. It also depends on understanding the gear you’re actually using to recreate the sounds. Learn the instruments, study the players, and trust what you hear in the isolated tracks. That is how you get it right.
Experience and practice matter. The more time you spend doing this, the better you’ll get at knowing what works and what needs fixing. Always listen back to your work on different sound systems. What sounds solid on studio monitors might fall apart in a live mix or feel flat when uploaded to YouTube. Checking your sounds in a range of environments helps you hear what needs more presence, less reverb, or better balance. The more you practice with intention, the more your ears and instincts improve.


Comentários